
When learning to play Digimon, knowing the layout of the game is very important. TCG players that play different games will have different habits on how they layout their board, so not all layouts look the same. Most, however, will try and adhere to the standard Digimon TCG Playmat layout. Here, we’ll break down all you need to know about a Digimon TCG Playmat and its various zones.

Credit: Digimon Card Game
The Digimon TCG Playmat Zones
There are multiple zones on a Digimon TCG Playmat. Starting from the top, and going clockwise, we have the all-important memory gauge. Using a counter (such as a coin), this scale is how players keep track of the sliding scale that is a player’s memory count. When a player’s memory slides past 0 to the opponent’s side after all effects have resolved, it becomes the next player’s turn.
Security Stack
Next, on the left, is the Security Stack. After a player has drawn their opening hand (and decided whether or not to mulligan) the player then takes the top 5 cards from their deck and places them 1 by 1 in the Security Stack. There is no set order on top to bottom or bottom to top for security, as long as a clear top and bottom are established and kept consistent when Security is interacted with. When damage is done, the corresponding number of cards are revealed from Security then sent to Trash after resolving any option/tamer card’s Security Effects, or comparing the DP of a revealed and battling Digimon.
Deck on Top?
Next are the Deck, and Trash. Depending on previous TCG experience, you may be used to the Deck being below the Discard Pile or above it. For official Digimon TCG playmat designs, the Deck goes above the Trash, or discard pile. Cards in Trash are public knowledge, so must be kept face up at all times. However, the order and orientation of the trash are freeform. For combo decks that reference pieces in your trash, you may opt to keep them separate below or next to your standard trash pile.
Official Digimon TCG Playmats designed for beginners, such as the ones present in the best Digimon starter decks tend to leave a space dedicated to the turn order. Reference this as many times as needed to play your phases in the correct order.
The Raising Area
The last dedicated Digimon TCG playmat zone is the Raising Area. Here, your Digi-Egg deck is placed face down (after shuffling if needed) in the left-hand zone. During the Breeding Phase, if there is no Digimon or Digi-Egg face up in the righthand zone of the Raising Area, you can “hatch” an egg. This is done by flipping the top card of the Digi-Egg deck and putting it in the righthand zone of the Raising Area.
The Digimon TCG Playmat is your Battle Area
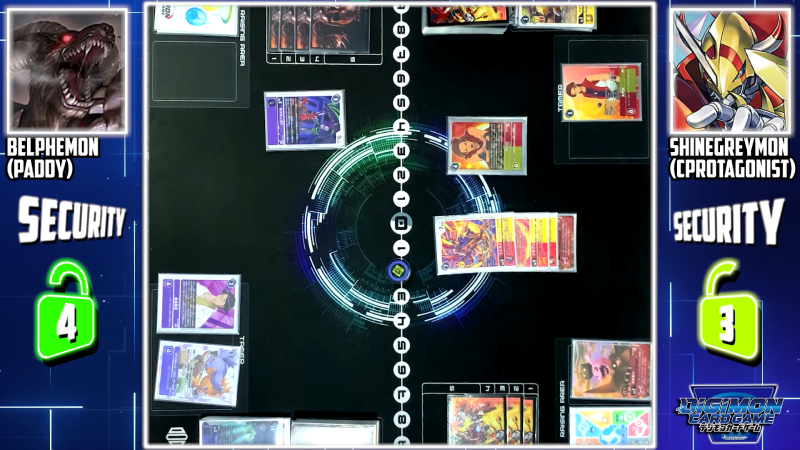
Source: CardProtagonist (YouTube)
Much like the article, the rest of the space that isn’t clearly marked by zone is free space for you to use. The “Battle Area” is commonly the center portion of your board. But it does extend down between your Raising Area and Trash. Some custom playmats will have dedicated space for different Digimon card types such as Tamers or Option cards. However, these are not mandatory, as players can pick and choose where to put these Digimon and other cards.
A well organized Battle Area is the key to keeping track of your Digimon TCG deck colors (for Option cards) and various Digimon. Practices such as keeping freshly played Digimon separate from your existing Digimon that can attack will help you navigate plays and not miscalculate your opportunities for Damage. The Battle Area is free flowing and forever Digivolving, so organize your board in a way that works best for you!